

by Ashley
Our 2011 Ford Explorer is only 7 years old, but it has been driven HARD. Every year since its purchase (we bought in 2012), we’ve driven cross-country at least twice, once in summer and once in winter. Our typical drive has been between 800-900 miles. We used to drive up to Utah when my Dad lived there (approximately 800 miles), and our trips to Austin rack up approximately 900 miles. That’s each way. Meaning, 1800 miles round-trip, at least twice per year. That’s a lot of road miles and often during harsh conditions of 100+ degree summer days and freezing winter weather.
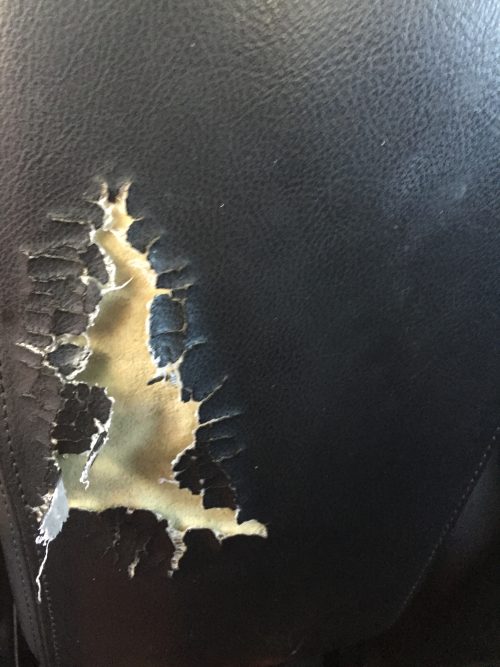
We’ll drive this baby ’till the wheels fall off. We paid it off back in January 2016 and have never looked back! But the poor thing has definitely shown its wear, being the primary family car and seeing our daughters grow from tiny little babies in rear-facing infant car-seats all the way to their current front-facing booster seats! One of the most noticeable signs of wear has been the cracking of the “leather” (pleather??) interior material on the armrests. The center console/armrest has taken a particular beating. There’s no real reason for it – the Explorer is mostly garage-kept and we try to take good care of it. But all the use has caused the armrest cover to crack. It’s not only unsightly, it’s downright painful! It’s actually caused small cuts and scrapes on my right arm when I’m driving! Ugh!
I bought a replacement leather cover oh……a year ago??? But I hadn’t followed through with installation because life happened and things got busy and I just forgot about it. I was recently cleaning out our hallway closet and came across the leather piece I had purchased. To clarify, this was literally just a piece of leather, NOT a full replacement piece. I think I paid $20 for it. To install, I would have to remove the center console lid, remove the leather, glue and staple-gun on the new leather, and re-install into the car.
Here’s the “Before”:
Installation Instructions:
As it turned out, there were NO videos on youtube that I could find with the proper instructions for my year/model of Explorer (again, I have a 2011 Ford Explorer). I literally had to search through internet chat rooms to find a thread where someone discussed the steps and process. I’ll detail them here, but to give proper credit, I found this info on explorerforum.com
- Open up the center console/armrest.
- Remove the piece the latch-hook goes into. It’s held together by two clips that easily disconnect.
- Once removed, disconnect the electrical component that goes into the cigarette lighter.
- Under this is a piece that has three small bolts that need to be removed.

- Once removed, unclip the sides of the console.
- Next, lift up on the front console piece (the one containing the cup holders and shifter). It’s held in place by four spring clips, two on each side. Note: it only raises a couple inches, NOT all the way out. You must unclip the sides of the console (step 5) before you can lift it up.
- The console bucket has four clips. Unclip and lift up on the bucket until it comes free. Again, it will NOT come all the way out, it will only lift a few inches.
- With the console bucket lifted, you should now be able to access the four torx screws on the lid hinge. Remove the screws and the console lid/center armrest should now come free!
Now is the whole process of removing the old/cracked leather and putting on the new leather. Our new leather piece came with a detailed instruction card, but I also easily found lots of youtube videos on this part of the process. See here for an example. Just for comparison, this was a total cinch in comparison to figuring out how to REMOVE the dang console lid in the first place! Check out the video I linked above, but the basic gist is that you remove the old leather (just pulling it off around the seams), stretch and glue the new leather into place and secure by using a heavy-duty stapler around the edges. Pretty easy.
Next, you follow the steps above in reverse to put the center console lid/armrest back into place.
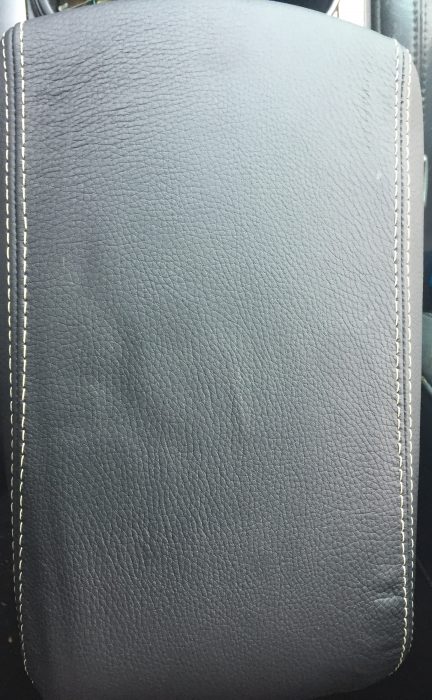
DONE! (Note: the leather looks like a totally different color, but it’s an exact match, only the thread is different. I just took the pictures at different times of day so the lighting was different).
I had hubs help me (it’s really kind of a two-person job – one person needs to hold the pieces up while the other person uses the screwdriver to unscrew the torx screws). But it’s not too complicated or difficult once you’ve got directions. We tried for awhile to figure it out on our own and it was NOT happening. But following the instructions, everything went seamlessly!
And now I have my brand new leather cover! I accidentally ordered a cover with grey/white stitching (the original was a dark colored stitching – you can see it in the original cracked photo above). But I’m totally NOT worried about it. I’m just so glad to finally have the new cover on and be able to make our road trips (and in-town driving, for that matter) without getting my arm all cut up anymore! Woohoo!!! Can’t beat a $20 fix to a big pain-in-the-butt problem!
Three cheers for DIY!
Have you recently completed a DIY project?

Hi, I’m Ashley! Arizonan on paper, Texan at heart. Lover of running, blogging, and all things cheeeeese. Early 40s, married mother of twins, and working in academia. Currently working toward financial independence with the goal of (hopefully!) retiring early at 50.
Great job! I honestly would never have thought of something like that.
Thank you for the guide. I followed the steps and after cuts and scrapes I changed out the armrest
I did want to share after completing the job I realized this could have been completed much easier.
Step 1: open the armrest lid
Step 2: take a small flat head and wedge between the plastic cover and leather.
Step 3: Pry the plastic cover off, there are 6 clips holding it in.
Step 4: remove the 4 Screw and remove the armrest.
Now you can replace the material.
Thanks for this! Where did you order the new cover from?